左手's Blog
我是左手,行走在路上!
lnmp编译日志
重新布署开发环境,基于CentOS6.4 64位。直接贴记录。
1. 基础配置
==================================================

1.1 连接网络
vi /etc/sysconfig/network-scripts/ifcfg-eth0

#NM_CONTROLLED="no"
ONBOOT="yes"

1.2 配置静态IP
IPADDR="192.168.80.91"
NETMASK="255.255.255.0"
BROADCAST="192.168.80.255"
GATEWAY="192.168.80.2"
DNS1="8.8.8.8"
DNS2="8.8.4.4"

1.3 配置网卡MAC地址
删除网卡信息
rm /etc/udev/rules.d/70-persistent-net.rules
重启

1.4 安装基础软件
yum install wget man lrzsz ntpdate

1.5 配置repe
wget http://mirrors.sohu.com/fedora-epel/6/x86_64/epel-release-6-8.noarch.rpm
rpm -ivh epel-release-6-8.noarch.rpm

1.6 更新源
yum makecache
yum update -x kernel*

1.7 更新系统
yum update

1.8 切换语言为中文
vi /etc/sysconfig/i18n
LANG="zh_CN.UTF-8"
source /etc/sysconfig/i18n

1.9 修改时区
tzselect
cp /usr/share/zoneinfo/Asia/Shanghai /etc/localtime

1.10 关闭防火墙和selinux
chkconfig iptables off
chkconfig ip6tables off
service iptables stop
service ip6tables stop

修改/etc/selinux/config文件中的SELINUX="" 为 disabled
如果不想重启系统,使用命令setenforce 0

1.11 加快启动
vi /boot/grub/grub.conf
修改 timeout = 5 为 timeout = 1


 1.12 安装工具
# 压缩解压工具
yum install p7zip-plugins
# 编译工具包软件
yum install gcc gcc-c++ make automake autoconf libtool zlib-devel openssl-devel

2. vmware相关配置
==================================================
2.1 添加虚拟硬盘
#查看
cat /proc/scsi/scsi
#添加
echo "scsi add-single-device 1 2 3 4" >>/proc/scsi/scsi
#移除
echo "scsi remove-single-device 1 2 3 4" >> /proc/scsi/scsi
#命令行解释
1 : SCSI HBA ID
2 : SCSI Channel
3 : SCSI ID
4 : LUN ID
#添加到第一块SCSI HBA, Channel 0, ID 3, LUN 0:
echo "scsi add-single-device 0 0 3 0" >>/proc/scsi/scsi

2.2 格式化,挂载
fdisk /dev/sdb 分区
mkfs.ext4 /dev/sdb1 格式化
mkdir /data
vi /etc/fstab
/dev/sdb1    /data    ext4    defaults    0 0
mount -a

2.3 安装vmtools
mkdir -p /mnt/cdrom
mount /dev/cdrom /mnt/cdrom
cp VMwareTools-9.2.0-799703.tar.gz /data/pkg/
cd /mnt/cdrom
umount /mnt/cdrom
tar -xzf VMwareTools-9.2.0-799703.tar.gz
开启时间同步
vmware-toolbox-cmd timesync enable

3. 编译软件
==================================================
目录配置
#创建/data目录,所有数据放在此文件夹中
mkdir /data
#存放源码包
mkdir /data/pkg
#存放解压代码
mkdir /data/src

3.1 nodejs
cd /data/pkg/
wget http://nodejs.org/dist/v0.10.10/node-v0.10.10.tar.gz
tar -xzf node-v0.10.10.tar.gz -C /data/src
cd /data/src/node-v0.10.10
./configure --prefix=/usr/local/node-v0.10.10
ln -s /usr/local/node-v0.10.4 /usr/local/node
mkdir /usr/local/node/node_modules
ln -s /usr/local/node/node_modules /usr/local/lib/
npm config set prefix /usr/local

vim /etc/prefix
#环境变量
export NODE_HOME=/usr/local/node
export NODE_PATH=$NODE_PATH/node_modules

export SOFT_PATH=$NODE_HOME/bin

PATH=$PATH:$SOFT_PATH

source /etc/prefix

npm config set prefix /usr/local

3.2 编译nginx
cd /data/pkg
wget http://nginx.org/download/nginx-1.4.1.tar.gz
tar -xzf nginx-1.4.1.tar.gz -C /data/src
#安装依赖
yum install pcre-devel
#添加用户
groupadd www
useradd -s /sbin/nologin -g www www -M
cd /data/src/nginx-1.4.1

./configure --prefix=/usr/local/nginx.basic \
--user=www \
--group=www \
--pid-path=/var/run/nginx.basic.pid \
--lock-path=/var/lock/nginx.basic.lock \
--with-http_ssl_module \
--with-http_dav_module \
--with-http_flv_module \
--with-http_realip_module \
--with-http_gzip_static_module \
--with-http_stub_status_module \
--with-mail --with-mail_ssl_module \
--http-client-body-temp-path=/var/tmp/nginx.basic/client \
--http-proxy-temp-path=/var/tmp/nginx.basic/proxy \
--http-fastcgi-temp-path=/var/tmp/nginx.basic/fastcgi \
--http-uwsgi-temp-path=/var/tmp/nginx.basic/uwsgi \
--http-scgi-temp-path=/var/tmp/nginx.basic/scgi \
--error-log-path=/var/log/nginx.basic.error.log \
--http-log-path=/var/log/nginx.basic.access.log

make && make install
vi /usr/local/nginx.basic/sbin/nginxd
###启动脚本### {{{
#!/bin/sh
#
# nginx - this script starts and stops the nginx daemon
#
# chkconfig:   - 85 15
# description:  Nginx is an HTTP(S) server, HTTP(S) reverse \
#               proxy and IMAP/POP3 proxy server
# processname: nginx
# config:      /etc/nginx/nginx.conf
# config:      /etc/sysconfig/nginx
# pidfile:     /var/run/nginx.pid

# Source function library.
. /etc/rc.d/init.d/functions

# Source networking configuration.
. /etc/sysconfig/network

# Check that networking is up.
[ "$NETWORKING" = "no" ] && exit 0
prefix="/usr/local/nginx.basic
nginx="${prefix}/sbin/nginx"
prog=$(basename $nginx)

NGINX_CONF_FILE="${prefix}/conf/nginx.conf"

[ -f /etc/sysconfig/nginx ] && . /etc/sysconfig/nginx

lockfile=/var/lock/subsys/nginx

make_dirs() {
   # make required directories
   user=`$nginx -V 2>&1 | grep "configure arguments:" | sed 's/[^*]*--user=\([^ ]*\).*/\1/g' -`
   if [ -z "`grep $user /etc/passwd`" ]; then
       useradd -M -s /bin/nologin $user
   fi
   options=`$nginx -V 2>&1 | grep 'configure arguments:'`
   for opt in $options; do
       if [ `echo $opt | grep '.*-temp-path'` ]; then
           value=`echo $opt | cut -d "=" -f 2`
           if [ ! -d "$value" ]; then
               # echo "creating" $value
               mkdir -p $value && chown -R $user $value
           fi
       fi
   done
}

start() {
    [ -x $nginx ] || exit 5
    [ -f $NGINX_CONF_FILE ] || exit 6
    make_dirs
    echo -n $"Starting $prog: "
    daemon $nginx -c $NGINX_CONF_FILE
    retval=$?
    echo
    [ $retval -eq 0 ] && touch $lockfile
    return $retval
}

stop() {
    echo -n $"Stopping $prog: "
    killproc $prog -QUIT
    retval=$?
    echo
    [ $retval -eq 0 ] && rm -f $lockfile
    return $retval
}

restart() {
    configtest || return $?
    stop
    sleep 1
    start
}

reload() {
    configtest || return $?
    echo -n $"Reloading $prog: "
    killproc $nginx -HUP
    RETVAL=$?
    echo
}

force_reload() {
    restart
}

configtest() {
  $nginx -t -c $NGINX_CONF_FILE
}

rh_status() {
    status $prog
}

rh_status_q() {
    rh_status >/dev/null 2>&1
}

case "$1" in
    start)
        rh_status_q && exit 0
        $1
        ;;
    stop)
        rh_status_q || exit 0
        $1
        ;;
    restart|configtest)
        $1
        ;;
    reload)
        rh_status_q || exit 7
        $1
        ;;
    force-reload)
        force_reload
        ;;
    status)
        rh_status
        ;;
    condrestart|try-restart)
        rh_status_q || exit 0
            ;;
    *)
        echo $"Usage: $0 {start|stop|status|restart|condrestart|try-restart|reload|force-reload|configtest}"
        exit 2
esac
###启动脚本结束### }}}
ln -s /usr/local/nginx.basic /usr/local/nginx
ln -s /usr/local/nginx/sbin/nginxd /etc/init.d/nginxd

# 修改启动用户为www
vim /usr/local/nginx/conf/nginx.conf
user www www;

# 添加开机启动
chkconfig --add nginxd

3.3 编译mysql
cd /data/pkg
wget http://cdn.mysql.com/Downloads/MySQL-5.6/MySQL-5.6.12-1.el6.src.rpm
rpm -ivh MySQL-5.6.12-1.el6.src.rpm
cp /root/rpmbuild/SOURCES/mysql-5.6.12.tar.gz /data/pkg
tar -xzf mysql-5.6.12.tar.gz -C /data/src/
yum install cmake bison gperf ncurses-devel readline-devel time
#添加mysql用户
groupadd mysql
useradd -s /sbin/nologin -g mysql mysql -M

cd /data/src/mysql-5.6.12
cmake . -DCMAKE_INSTALL_PREFIX=/opt/mysql5.6
make && make install

cd /opt/mysql5.6
./scripts/mysql_install_db --user=db
vi my.cnf

datadir = /opt/mysql5.6/data
socket = /tmp/mysql.sock
pid-file = /var/run/mysql.pid

ln -s /opt/mysql5.6/support-files/mysql.server /etc/rc.d/init.d/mysqld
/etc/rc.d/init.d/mysqld start
#修改密码
./bin/mysqladmin -u root password '123456'

#添加开机启动
chkconfig --add mysqld


3.4 编译php
cd /data/pkg/
wget http://ftp.gnu.org/pub/gnu/libiconv/libiconv-1.14.tar.gz
wget http://tw1.php.net/distributions/php-5.3.26.tar.gz
tar -xzf libiconv-1.14.tar.gz -C /data/src
tar -xzf php-5.3.26.tar.gz -C /data/src

yum install libxml2-devel curl-devel libjpeg-devel libpng-devel gd-devel freetype-devel zlib-devel libmcrypt-devel libtool-ltdl-devel
cd /data/src/libiconv-1.14/

./configure --prefix=/usr/local/libiconv
make && make install
echo "/usr/local/libiconv/lib">>/etc/ld.so.conf.d/usr_local_lib.conf
ldconfig

ldconfig -p | grep libiconv

cd /data/src/php-5.3.26/

./configure \
--prefix=/usr/local/php5.3 \
--with-config-file-path=/usr/local/php5.3/etc \
--with-config-file-scan-dir=/usr/local/php5.3/etc/conf.d \
--with-mysql=mysqlnd \
--with-iconv=/usr/local/libiconv \
--with-freetype-dir \
--with-jpeg-dir \
--with-zlib \
--with-libxml-dir=/usr \
--enable-xml \
--disable-rpath \
--enable-discard-path \
--enable-safe-mode \
--enable-bcmath \
--enable-shmop \
--enable-sysvsem \
--enable-inline-optimization \
--with-curl \
--with-curlwrappers \
--enable-mbregex \
--enable-fpm \
--enable-mbstring \
--with-mcrypt \
--with-gd \
--enable-gd-native-ttf \
--with-openssl \
--with-mhash \
--enable-pcntl \
--enable-sockets  \
--with-xmlrpc \
--enable-zip \
--enable-soap \
--with-pdo-mysql=mysqlnd \
--with-mysqli=mysqlnd

make ZEND_EXTRA_LIBS='-liconv'
make install

#复制配置文件
ln -s /usr/local/php5.3 /usr/local/php
mkdir /usr/local/php/etc/back
cp php.ini* /usr/local/php/etc/back
cp sapi/fpm/init.d.php-fpm /usr/local/php/bin/php-fpm
#因为php5.3开始自带fpm,使用自带的管理脚本
cd /usr/local/php/etc
cp back/php-fpm.conf.default ./php-fpm.conf
cp back/php.ini-production ./php.ini

#修改 php-fpm.conf
vi /usr/local/php/etc/php-fpm.conf
修改  ;pid = run/php-fpm.pid 为  pid = run/php-fpm.pid (去掉前面的分号)
修改 user = nobody 为 user = www
修改 group = nobody 为 group = www

#配置php-fpm
chmod +x /usr/local/php/bin/php-fpm
ln -s /usr/local/php/bin/php-fpm /etc/init.d/php-fpm

#添加启服务
chkconfig --add php-fpm
#启动php-fpm
service php-fpm start

3.5 编译python
cd /data/pkg/
wget http://www.python.org/ftp/python/2.7.5/Python-2.7.5.tgz
tar -xjf Python-2.7.5.tgz -C /data/src
cd /data/src/Python-2.7.5
./configure --prefix=/usr/local/python27
make && make install

rm /bin/python /bin/python2 -f
#修改yum,引用python2.6
vi yum
#!/usr/bin/python26

配置PATH
vi /etc/profile
export PY_PATH=/usr/local/python27
在SOFT_PATH后面加上:$PY_PATH/bin
}}}
cd /usr/bin
rm python
vi yum
#!/usr/bin/python2.6

3.6 编译安装ruby
wget http://pyyaml.org/download/libyaml/yaml-0.1.4.tar.gz
wget ftp://ftp.ruby-lang.org/pub/ruby/2.0/ruby-2.0.0-p195.tar.bz2
tar -zxf yaml-0.1.4.tar.gz -C /data/src
tar -jxf ruby-2.0.0-p195.tar.bz2 -C /data/src

yaml
cd /data/src/yaml-0.1.4 #pwd
./configure --prefix=/usr/local/libyaml
make && make install

ruby
cd /data/src/ruby-2.0.0-p195
./configure --prefix=/usr/local/ruby200 --enable-shared --disable-install-doc --with-opt-dir=/usr/local/libyaml
make && make install

vi /etc/profile
export RUBY_PATH=/usr/local/ruby200
在SOFT_PATH后面加上:$RUBY_PATH/bin

gem sources --remove http://rubygems.org/
gem sources -a http://ruby.taobao.org/
gem update --system


4. 其它配置
4.1 目录配置
#放置网站
mkdir /data/www
ln -s /data/www /www
#放置配置
mkdir cfg
mkdir cfg/nginx #nginx配置
mkdir cfg/php53 #php5.3配置
mkdir cfg/vim #vim配置

4.2 配置samba
yum install samba

#存放samba共享
mkdir /share

groupadd share
useradd -M -s /sbin/nologin -g share share
#设置share帐号的samba密码
smbpasswd -a share
chown share:share /share
chmod 777 /share

vi /etc/samba/smb.conf
# 在[global]处添加
; 软链接
follow symlinks = yes
wide links = yes
unix extensions = no

# 在底部添加
[Share]
comment = share
path = /share
public = no
writable = yes
valid users = share
; 权限
force user = root
force group = root
create mask = 0664
directory mask = 0775

#链接目录
ln -s /data /share
ln -s /data/www/ /share/
ln -s /data/cfg /share/
ln -s /data/local /share
ln -s /data/opt /share
ln -s /data/src /share
ln -s /data/pkg /share

4.3 php扩展
安装 APC redis
/usr/local/php/bin/phpize
./configure --enable-apc --with-php-config=/usr/local/php/bin/php-config
make
make install

vi /usr/local/php/etc/conf.d/apc.ini

extension = "apc.so"
apc.enabled = 1
apc.cache_by_default = on
apc.shm_segments = 1
apc.shm_size = 32M
apc.ttl = 3600
apc.user_ttl = 3600
apc.num_files_hint = 0
apc.write_lock = On

vi /usr/local/php/etc/conf.d/redis.ini

[redis]
extension = "redis.so"


4.4 nginx模板范本
# localhost
server {
    listen 80 default;
    root /www/localhost;
    index  index.html index.htm index.php index-dev.php;
    server_name localhost;

    location ~* \.php {
        fastcgi_pass 127.0.0.1:9000;
        #fastcgi_pass unix:/tmp/nginx_sockets_php5-fpm.sock;
        fastcgi_index index-dev.php;
        include fastcgi.conf;
        set $path_info "";
        set $real_script_name $fastcgi_script_name;
        if ($fastcgi_script_name ~ "^(.+?\.php)(/.+)$") {
            set $real_script_name $1;
            set $path_info $2;
        }
        fastcgi_param PATH_INFO $path_info;
        fastcgi_param SCRIPT_NAME $real_script_name;
        #fastcgi_split_path_info ^((?U).+\.php)(/?.+)$;
        #fastcgi_param PATH_INFO $fastcgi_path_info;
        #fastcgi_param PATH_TRANSLATED $document_root$fastcgi_path_info;
    }
    location ~* \.(jpg|png|jpeg|bmp|gif|swf|js|css) {
        #expires 7d;
        access_log off;
        add_header Cache-Control no-cache;
    }
    #if (!-e $request_filename) {
        #rewrite ([0-9]+)-qr\.png$ /qr.php?id=$1 last;
        #rewrite "^(.*)\.[0-9]{8,}\.(js|css|png|jpg|gif|bmp|ico)" $1.$2 last;
        #rewrite ^(((?!\.php).)*)$ /index-dev.php$1 break;
        #rewrite  ^(.*)$  /index-dev.php?s=$1 break;
        #rewrite  ^(.*)$  /index-dev.php$1 last;
    #}
}
CentOS添加git命令补全及分支显示
CentOS上用yum装好git以后,默认没有命令补全。需要简单配置一下。
1.编辑 ~/.bash_profile 文件,添加以下内容
if [ -f /etc/bash_completion.d/git ]; then
. /etc/bash_completion.d/git
fi
export GIT_PS1_SHOWDIRTYSTATE=true
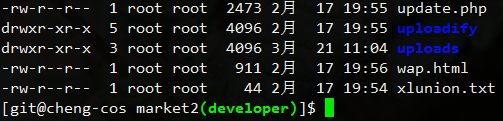
PS1='[\u@\h \W\[\033[01;32m\]$(__git_ps1 "(%s)")\[\033[00m\]]\$ '
2.应用修改
source ~/.bash_profile
修改之后的效果如下图:
nginx更换启动脚本
之前使用的nginx启动脚本交互提示信息不全,使用起来不太方便。浏览nginx wiwk时看到一个启动脚本,想尝试一下。
脚本地址:http://wiki.nginx.org/RedHatNginxInitScript
配置好参数和启动脚本权限后启动nginx使用时报如下错误。
/etc/init.d/nginx start
grep:无法识别的选项“--prefix=/usr/local/nginx.base”
用法: grep [选项]... PATTERN [FILE]...
试用‘grep --help’来获得更多信息。
useradd:无法识别的选项“--prefix=/usr/local/nginx.base”
细看启动脚本,找到这段内容。
make_dirs() {
   # make required directories
   user=`$nginx -V 2>&1 | grep "configure arguments:" | sed 's/[^*]*--user=\([^ ]*\).*/\1/g' -`
   if [ -z "`grep $user /etc/passwd`" ]; then
       useradd -M -s /bin/nologin $user
   fi
   options=`$nginx -V 2>&1 | grep 'configure arguments:'`
   for opt in $options; do
       if [ `echo $opt | grep '.*-temp-path'` ]; then
           value=`echo $opt | cut -d "=" -f 2`
           if [ ! -d "$value" ]; then
               # echo "creating" $value
               mkdir -p $value && chown -R $user $value
           fi
       fi
   done
}
脚本每次都会调用nginx -V,取得编译时用--user指定的用户名。如果指定的用户不存在,则会创建该用户。还会根据编译的参数创建临时目录,并且修改权限。没有考虑未使用--user指定用户的场景,我编译nginx时没有加--user参数,就报错了。
重新编译了nginx,添加--user参数,指定用户以后正常了。这个启动脚本考虑的情况较多,交互提示较之前的更为人性化,效果不错。如果应用场景不允许重新编译nginx,可以直接跳过 make_dirs() 这个函数,在 # make required directories 上面加入一行 return 1 即可。
附本人nginx编译参数,系统是CentOS 6.3。
./configure --prefix=/usr/local/nginx.base \
--user=www \
--group=www \
--pid-path=/var/run/nginx.pid \
--lock-path=/var/lock/nginx.lock \
--with-http_ssl_module \
--with-http_flv_module \
--with-http_realip_module \
--with-http_gzip_static_module \
--with-http_stub_status_module \
--with-mail --with-mail_ssl_module \
--http-client-body-temp-path=/usr/local/nginx.base/tmp/client \
--http-proxy-temp-path=/usr/local/nginx.base/tmp/proxy \
--http-fastcgi-temp-path=/usr/local/nginx.base/tmp/fastcgi \
--http-uwsgi-temp-path=/usr/local/nginx.base/tmp/uwsgi \
--http-scgi-temp-path=/usr/local/nginx.base/tmp/scgi
linux web服务器iptables设置
iptables -P INPUT ACCEPT
iptables -P OUTPUT ACCEPT
iptables -P FORWARD ACCEPT
# 先把所有规则打开,则否ssh可能直接断掉

iptables -F
iptables -X
# 清除已有规则

iptables -A INPUT -p tcp --dport 22 -j ACCEPT
# 先把ssh端口加上

iptables -P INPUT DROP
iptables -P FORWARD DROP
# 设置INPUT和FORWARD为封锁

iptables -A INPUT -i lo -j ACCEPT
# 开启本地环路,使得ping 127.0.0.1这样的包以通过。php-fpm的http://127.0.0.1:9000可以使用
iptables -A INPUT -p icmp -j ACCEPT
# 允许其它机器ping这台服务器
iptables -A INPUT -m state --state ESTABLISHED,RELATED -j ACCEPT
# 允许自己发送包的返回通信,不开启这个,机器上面使用ping www.google.com这样的无法拼通

iptables -A INPUT -p tcp --dport 80 -j ACCEPT
# 开放web端口

/etc/init.d/iptables save
# 保存设置
/etc/init.d/iptables restart
# 重启iptables
[Fedora开发环境搭建]搭建LNMP开发环境
Fedora17上能找到的PHP最低版本为5.4.x。因公司项目开发较早,仅能在上5.3.x上面正常运行,所以php采用编译方式安装,nginx、mysql使用源来安装。
1.安装nginx、mysql并设置自动启
2.安装基础库
3.下载源代码包
wget http://ftp.gnu.org/pub/gnu/libiconv/libiconv-1.14.tar.gz
4.编译
#建立软链接
#编译
#复制配置文件
#配置php-fpm
sudo vim /usr/local/php/etc/php-fpm.conf
cd /usr/local/srctar -zxvf APC-3.1.9.tgzcd APC-3.1.9/usr/local/php/bin/phpize./configure --enable-apc --enable-apc-mmap --with-php-config=/usr/local/php/bin/php-configmakemake install添加apc扩展
sudo mkdir /usr/local/php/etc/conf.d
参考链接:http://solf.me/compile-nginx-php-mysql-on-centos-lnmp/
[Fedora开发环境搭建]索引贴
Fedora开发环境搭建系列文章主要记录本人的Fedora系统web开发环境搭建,希望相关信息能对大家有帮助。
*基于Fedora17
- 添加网易镜像源并更新到最新
- 搭建LNMP开发环境
- 配置nginx站点(待更新)
- 安装常用软件(待更新)