左手's Blog
我是左手,行走在路上!
[锋利web前端开发]sass小技巧图片版本号和绝对路径引用
锋利web前端为一个系列文章,分享利用python、vimscript等语言,整合haml、sass、coffee等实现快速前端开发。
可以到 [锋利web前端开发]索引贴 查看当前系列的所有文章
本篇讲解sass中的通过变量来控制图片版本号和路径。
版本号应用场景:背景图片更新过后,浏览器缓存了之前的背景图片,用户需要强制刷新浏览器才能看到最新更新。有时候这种情形是无法接受的,通过给背景图片添加一个get参数,使浏览器重新请求图片。修改$CVS变量,重新生成css文件就可以了。
绝对路径应用场景:ie6下面的AlphaImageLoader无法使用相对路径,手动编码在开发环境迁移到产品环境时可能因为路径改变而需要手动修改多处。sass中指定一个绝对路径的变量即可,在需要时修改变量,重新生成css文件就可以轻松维护。有些项目要求全部使用绝对路径,但开发的时候硬盘本地文件都是使用相对路径引用的。在上线前将变量修改为绝对路径,迁移到线上环境。
sass代码
$CVS: '2711'
$IMGURL: '../img'
$FULLIMGURL: '/public/img'

.test
  width: 120px
  height: 40px
  background: url(#{$IMGURL}/button.png?t=#{$CVS}) 0 0 no-repeat
  .ie6 &
    background-image: none
    filter: progid:DXImageTransform.Microsoft.AlphaImageLoader(src="#{$FULLIMGURL}/img/button.png?t=#{$CVS}")
css代码
.test { width: 120px; height: 40px; background: url(../img/button.png?t=2711) 0 0 no-repeat; }
.ie6 .test { background-image: none; filter: progid:DXImageTransform.Microsoft.AlphaImageLoader(src="/public/img/img/button.png?t=2711"); }
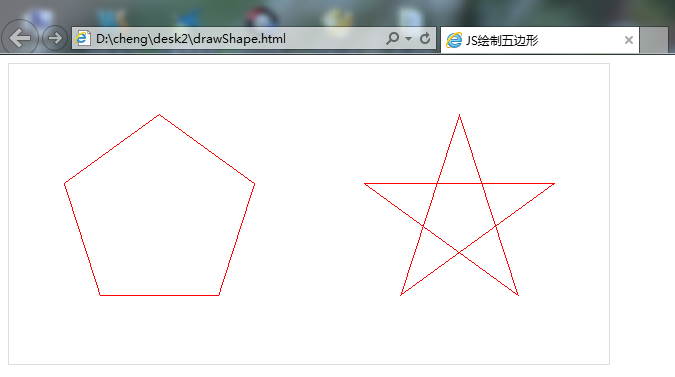
js点阵绘制5边形
更新说明:
2013-05-27 上传到gitcafe上面拖管 https://gitcafe.com/lcc/somecode/tree/master/jsdraw
写了一段生成象素点来绘制5边形的代码。用到了 Bresenham斜线画法、三角函数等知识。代码如下:
<!DOCTYPE html>
<html lang="zh-cn">
<head>
  <meta charset="UTF-8">
  <title>JS绘制五边形</title>
  <style type="text/css">
    .paper {
      width: 600px;
      height: 300px;
      border-color: #E0E0E0;
      border: 1px solid #DDD;
      position: relative;
    }
    .point {
      width: 1px;
      height: 1px;
      position: absolute;
      overflow: hidden;
      display: block;
      zoom: 1;
    }
    .red {
      background-color: red;
    }
  </style>
  <script type="text/javascript">
    // 画斜线
    function drawLine(point1, point2) {
      var point, pointElem, paper;

      pointElem = document.createElement('div');
      if ('className' in pointElem) {
        pointElem.className = 'point red';
      }
      else {
        pointElem.setAttribute('class', 'point red');
      }

      paper = document.getElementById('paper');

      var xLen = Math.abs(point2[0] - point1[0]);
      var yLen = Math.abs(point2[1] - point1[1]);
      var x, y, cx, cy, tox, toy, rate, rateVal, isAdd = true;
      // 从x轴遍历
      if (xLen >= yLen) {
        if (point1[0] > point2[0]) { point1 = [point2, point2=point1][0]; }
        if (point1[1] > point2[1]) { isAdd = false; }

        x = cx = point1[0];
        y = cy = point1[1];
        tox = point2[0];
        toy = point2[1];

        rateVal = rate = parseInt( (yLen / xLen) * 1000)
        for (var i=x; i<tox; i++) {
          cx = i;
          point = pointElem.cloneNode();
          paper.appendChild(point);
          point.style.left = cx + 'px';
          point.style.top = cy + 'px';
          rateVal += rate
          if (rateVal >= 1000) {
            cy += isAdd ? 1 : -1
            rateVal -= 1000;
          }
        }
      }
      // 从y轴遍历
      else {
        if (point1[1] > point2[1]) { point1 = [point2, point2=point1][0]; }
        if (point1[0] > point2[0]) { isAdd = false; }

        x = cx = point1[0];
        y = cy = point1[1];
        tox = point2[0];
        toy = point2[1];

        rateVal = rate = parseInt( (xLen / yLen) * 1000)
        for (var i=y; i<toy; i++) {
          cy = i;
          point = pointElem.cloneNode();
          paper.appendChild(point);
          point.style.left = cx + 'px';
          point.style.top = cy + 'px';
          point = null
          rateVal += rate
          if (rateVal >= 1000) {
            cx += isAdd ? 1 : -1
            rateVal -= 1000;
          }
        }
      }
      // 补点
      if (cx != tox || cy != toy) {
        point = pointElem.cloneNode();
        paper.appendChild(point);
        point.setAttribute('style', 'left:' + tox + 'px; top:' + toy + 'px');
        point = null
      }
      pointElem = null;
    }
    // 获取点信息
    function getPointInfo(R, dot) {

      var A = 360 / 5
      var sinLen = Math.sin(A / 180 * Math.PI) * R
      var cosLen = Math.cos(A / 180 * Math.PI) * R
      sinLen = Math.round(sinLen)
      cosLen = Math.round(cosLen)

      var point1 = [dot[0], dot[1] - R]
      var point2 = [dot[0] + sinLen, dot[1]- cosLen]
      var point5 = [dot[0] - sinLen, dot[1] - cosLen]

      var A2 = (180 - A) / 2
      sinLen = Math.sin(A2 / 180 * Math.PI) * R
      cosLen = Math.cos(A2 / 180 * Math.PI) * R
      sinLen = Math.round(sinLen)
      cosLen = Math.round(cosLen)

      var point3 = [dot[0] + cosLen, dot[1] + sinLen]
      var point4 = [dot[0] - cosLen, dot[1] + sinLen]

      return [point1, point2, point3, point4, point5];
    }
    // 画点
    function drawShape(type, R, dot) {
      var pointInfo = getPointInfo(R, dot)
      var point1 = pointInfo[0];
      var point2 = pointInfo[1];
      var point3 = pointInfo[2];
      var point4 = pointInfo[3];
      var point5 = pointInfo[4];
      // 五边形
      if (type == 1) {
        drawLine(point1, point2);
        drawLine(point2, point3);
        drawLine(point3, point4);
        drawLine(point4, point5);
        drawLine(point5, point1);
      }
      // 五角星
      else if (type == 2){
        drawLine(point1, point3);
        drawLine(point3, point5);
        drawLine(point5, point2);
        drawLine(point2, point4);
        drawLine(point1, point4);
      }
    }

    window.onload = function () {
      drawShape(1, 100, [150, 150])
      drawShape(2, 100, [450, 150])
    }
  </script>
</head>
<body>
  <div id="paper" class="paper"></div>
</body>
</html>
效果图:
windows下安装绿色版nodejs
经常折腾系统,来回切换或更换系统。官方的安装程序每次都要重新安装npm包比较麻烦。折腾了下,下载二进制文件,配置环境变量来安装nodejs。
1、下载nodejs
http://nodejs.org/dist/v0.10.7/node.exe 下载的文件放到D:\node目录下
2、下载npm
http://nodejs.org/dist/npm/npm-1.2.22.zip 将压缩包中的 npm.cmd node_modules 解压到D:\node目录下。注意是.zip格式的,不是.tgz格式的,两个包里面的内容不同。
3、设置环境变量
新建2个环境变量
NODE_HOME 值 D:\node
NODE_PATH 值 %NODE_HOME%\node_modules
在PATH后面追加 ;%NODE_HOME%
4、打开cmd,输入npm ls -g,这时应该能打印出包的信息,说明安装成功。
[锋利web前端开发]sass小技巧extend和include组合运用
锋利web前端为一个系列文章,分享利用python、vimscript等语言,整合haml、sass、coffee等实现快速前端开发。
可以到 [锋利web前端开发]索引贴 查看当前系列的所有文章
本篇讲解sass中的extend和include的运用
经常能看到某些网站的css中,将多个引用到同一个背景图片的样式定义在一处。例如淘宝的这段。
.search-panel button,
.search-panel-fields s,
.search-fix,
.help-guest a,
.product-list,
.tmall-interlayer-title,
.tmall-slide-left,
a.tmall-slide-left:hover,
.tmall-slide-right,
a.tmall-slide-right:hover,
.guang-topics ol,
p.hotsale-free-sent {
   background:url(http://img03.taobaocdn.com/tps/i3/T1ZeuRXaFtXXXXXXXX-300-429.png) no-repeat;
}
以传统的css开发方式,我们需要手动将引用这个背景图片的样式名整理在一起。下面看一种以sass实现的方式:
.Cbg_btn1
  background-image: url(../img/bg_btn1.png)
  _background-image: url(../img/bg_btn1.8bit.png)

@mixin bg_btn1($top: 0, $left: 0, $rep: no-repeat)
  @extend .Cbg_btn1
  background-position: $left $top
  background-repeat: $rep

.btn1
  +bg_btn1(-50px)
.btn2
  +bg_btn1(-100px)
.btn3
  +bg_btn1(-100px)
.Cbg_btn1, .btn1, .btn2, .btn3 { background-image: url(../img/bg_btn1.png); _background-image: url(../img/bg_btn1.8bit.png); }

.btn1 { background-position: 0 -50px; background-repeat: no-repeat; }

.btn2 { background-position: 0 -100px; background-repeat: no-repeat; }

.btn3 { background-position: 0 -100px; background-repeat: no-repeat; }
如果换成以sass代码的方式实现,再转换成css代码,就可以非常方便的在当前样式中引用这个背景图片。上例中还通过定义变量设定背景图片的版本号,在下次背景图片进行修改后,只需要更新变量重新生成css文件,就可以跳过用户浏览器的缓存,让修改即立刻呈现在用户面前。
关于nginx配置PATH_INFO的坑
之前在网上找nginx配置PATH_INFO的方法,有一种是将PATH_INFO的值指定为$fastcgi_script_name,在php.ini中设置cgi.fix_pathinfo的值为1,前天在使用某款依赖PATH_INFO的框架时,果断被坑。将入口文件改为请求 http://localhost/index-dev.php时,PATH_INFO的值为 index-dev.php,框架将index-dev框架识别为controller报错。
附可用的配置方法:
set $path_info "";
set $real_script_name $fastcgi_script_name;
if ($fastcgi_script_name ~ "^(.+?\.php)(/.+)$") {
    set $real_script_name $1;
    set $path_info $2;
}
fastcgi_param PATH_INFO $path_info;
fastcgi_param SCRIPT_NAME $real_script_name;
几种配置方案PATH_INFO值的对比:
| 配置类型 | 请求地址 | PATH_INFO | PHP_SELF | SCRIPT_NAME | 说明 |
| Apache | /test.php | 无 | /test.php | /test.php | Apache的值为参考 |
| /test.php/abc/123 | /abc/123 | /test.php/abc/123 | /test.php | Apache的值为参考 | |
|
nginx设置PATH_INFO 和SCRIPT_NAME |
/test.php | no value | /test.php | /test.php | 正常 |
| /test.php/abc/123 | /abc/123 | /test.php/abc/123 | /test.php | 正常 | |
|
nginx设置PATH_INFO的值为 $fastcgi_script_name |
/test.php | /test.php | /test.php/test.php | /test.php |
PATH_INFO异常 PHP_SELF异常 |
| /test.php/abc/123 | /abc/123 | /test.php/abc/123 | /test.php | PHP_SELF异常 |
另外:网上所提的 cgi.fix_pathinfo 打开时的露洞,已修补。cgi.fix_pathinfo的值设为0时,请求/test.php/abc/123的地址时,会报 Access denied. 的错误。
解决csExplorer插件ColorSchemeExplorer第4行报错
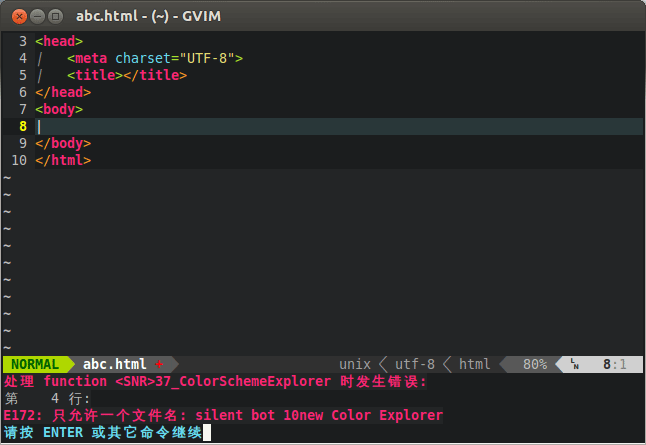
csExplorer一个挺好用的vim配色选择工具。但是在ubuntu下的gvim中用时,报错。
处理 function <SNR>37_ColorSchemeExplorer 时发生错误:
第4行
E172: 只允许一个文件名:silent bot 10new Color Explorer
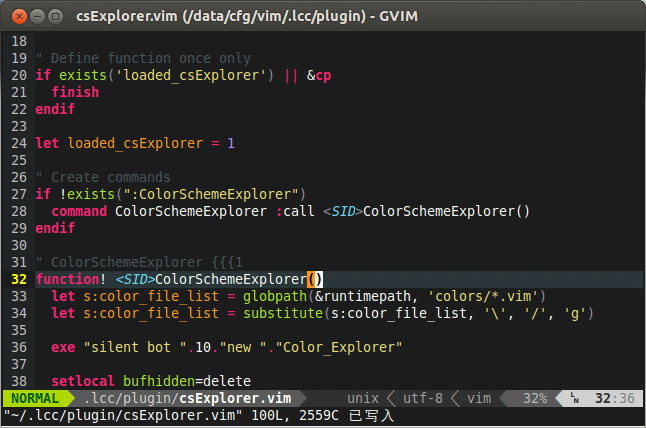
打开csExplorer插件,将第36行 exe "silent bot ".10."new "."Color Explorer" 改成 exe "silent bot ".10."new "."Color_Explorer" 就可以了。
相关截图:
1.报错信息
2.修改位置
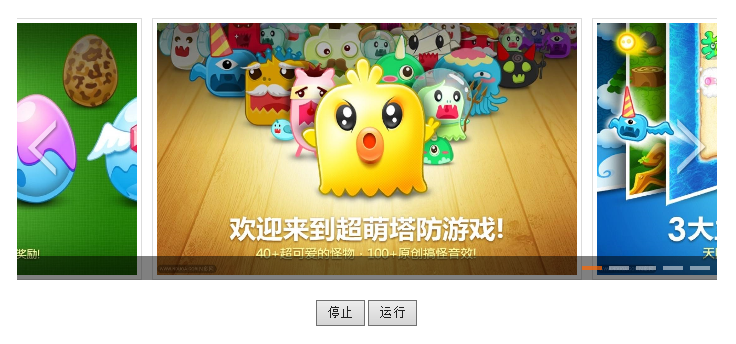
重构jquery图片切换插件ntabs
重构了公司产品中使用的tabs插件,添加了版本控制功能。github: https://github.com/thinkjs/ntabs
截图预览:
1.
2.

3.

我的vim配置分割方案
初学vim的时候在网上找过很多vim配置,大多是把所有内容放在 .vimrc 文件中。单个文件内容太多,查找及维护也比较麻烦,不方便多个配置方案的切换。自己抽时间整理了一个方案,共享一下。
1.入口配置文件
.vimrc作为配置的入口。只放简单的配置加载函数。内容如下:
" load lcc {{{
" 如果你不想加载lcc,请取消下面这一行的注释
" let g:lcc_loaded = 1
" 设置配置文件加载方式
let g:lcc_runtime=1
let s:lcc_path=expand('<sfile>:h').'/.lcc'
fu! LoadLCC()
	let g:lcc_loaded=1
	if !exists('$VIMFILES')
		" 根据配置文件判断加载目录
		if g:lcc_runtime == 0
			let $VIMFILES=filereadable(split(&rtp, ',')[0].'/conf/main.vim') ? split(&rtp, ',')[0] :
						\ filereadable(split(&rtp, ',')[1].'/conf/main.vim') ? split(&rtp, ',')[1] :
						\ ''
		" 针对自定义目录
		elsei g:lcc_runtime == 4
			let $VIMFILES=s:lcc_path
			exe 'se rtp+='.escape(s:lcc_path.','.s:lcc_path.'/after', ' ')
		en
	en
	" 加载主配置文件
	" filereadable
	so $VIMFILES/conf/main.vim
endf
" start lcc happy viming!
if !exists('g:lcc_loaded') | cal LoadLCC() | en
" }}}
lcc_runtime为1时,自动查找rtp的第1个路径和第2个路径,根据是否存在主配置文件来设定配置文件的路径,配置文件可以放在$HOME或者$VIM下面,可同时兼容linux和win。lcc_runtime为4时,根据lcc_path的值指定一个runtime,并加载这个runtime中的配置。
2.主配置文件
$VIMFILES/conf/main.vim文件做为主配置文件,在其中加载各项分割配置文件,定义一些特殊功能等。内容如下:
" --------------------------------------------------
" [分配置文件加载] {{{1
" --------------------------------------------------
" 加载设置选项 访问命令 \es
so <sfile>:p:h/set.vim
" 加载插件配置,插件对应热键定义在内 访问命令 \ed
so <sfile>:p:h/plugin.vim
" 加载自定义函数 访问命令 \ef
so <sfile>:p:h/function.vim
" 加载按热键配置 访问命令 \eg
so <sfile>:p:h/keyboard.vim
" 加载自定义命令 访问命令 \ec
so <sfile>:p:h/command.vim
" 加载项目配置文件 访问命令 \ep
ru conf/project.vim
" 1}}}
project.vim存放当前开发项目的一些特殊配置,使用ru命令不存在该文件时忽略错误。
CentOS添加git命令补全及分支显示
CentOS上用yum装好git以后,默认没有命令补全。需要简单配置一下。
1.编辑 ~/.bash_profile 文件,添加以下内容
if [ -f /etc/bash_completion.d/git ]; then
        . /etc/bash_completion.d/git
fi
export GIT_PS1_SHOWDIRTYSTATE=true
PS1='[\u@\h \W\[\033[01;32m\]$(__git_ps1 "(%s)")\[\033[00m\]]\$ '
2.应用修改
source ~/.bash_profile
修改之后的效果如下图:
LNMP环境创建ThinkPHP项目
看到ThinkPHP发布了3.1.3版本,下载了一个创建项目玩玩。中间还遇到些小问题,记录一下。
1.下载解压缩TP
unzip ThinkPHP3.1.3_Full.zip -d /www/lib/
2.创建项目文件
cd /www/cms/tp
vim index.php
<?php
  define('APP_DEBUG', 1);
  require '../../lib/ThinkPHP/ThinkPHP.php';
3.修改权限
chmod 775 . -R
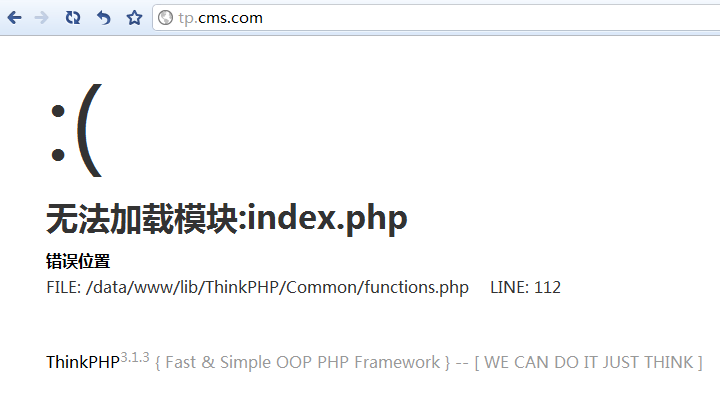
4.浏览器访问,基本上会出现如下错误
无法加载模块:index.php
错误位置
FILE: /data/www/lib/ThinkPHP/Common/functions.php LINE: 112
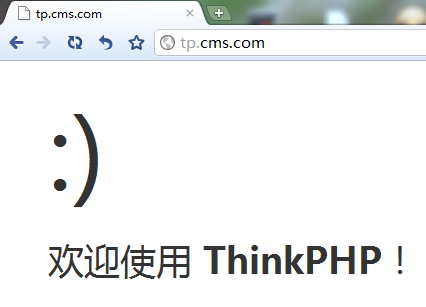
5.编辑配置文件
vim Conf/config.php
<?php
return array(
  //'配置项'=>'配置值'
  'URL_HTML_SUFFIX' => '',
  'URL_CASE_INSENSITIVE' => 1,
);
?>
至此大功告成
附本人nginx host配置
# tp.cms.com
server {
    listen       80;
    root /www/cms/tp;
    index  index.html index.htm index.php index-dev.php;
    server_name  .tp.cms.com;

    location ~* \.php {
      fastcgi_pass 127.0.0.1:9000;
      #fastcgi_pass unix:/tmp/nginx_sockets_php5-fpm.sock;
      fastcgi_index index.php;
      include fastcgi.conf;
      set $path_info "";
      set $real_script_name $fastcgi_script_name;
      if ($fastcgi_script_name ~ "^(.+?\.php)(/.+)$") {
        set $real_script_name $1;
        set $path_info $2;
      }
      fastcgi_param PATH_INFO $path_info;
      fastcgi_param SCRIPT_NAME $real_script_name;
      fastcgi_param SCRIPT_FILENAME $document_root$fastcgi_script_name;
    }

    if (!-e $request_filename) {
      rewrite  ^(.*)$  /index.php$1 break;
    }
}
更新记录:
2015-12-28:修改nginx配置的错误